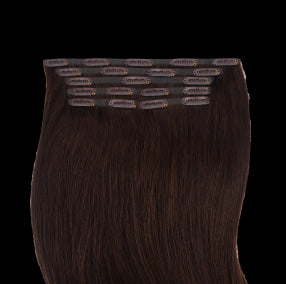
Hi there, I’m Taylor, Community Coordinator for Glam Seamless. So, I've always been a DIY hair extensions wearer with my go-to favorite being clip-ins (iykyk). Truth is, I was a little intimidated by semi-permanent methods. Lately, I’ve wanted to step out of my comfort zone, so I made my first appointment for a tape-ins installation. Now, I'm a tape-ins lifer and excited to share my journey with you!
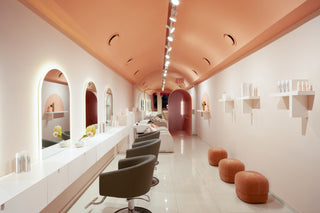
Glam Seamless has two salon locations, one in Los Angeles in Weho, and our flagship salon in NYC in Soho. As I’m local to NYC, I’m booking my appointment at Soho salon with our amazingly talented stylist, Kelsey Jurado. Before booking my appointment I needed to get color matched. It’s recommended to get a color match before booking an appointment. There are a couple ways to get a color match making the process super convenient. I could visit Soho for a free consultation–no appointment needed! If you are local this is recommended so the stylist can see your hair in natural light and advise on the best method for your hair type. Plus, once your consultation is complete the stylist can order your hair right there in the store. Or, I could go online to glamseamless.com and connect with a Glam Seamless stylist through the FREE virtual color match.
Getting my color match! 📸 journey by @seanmgioia
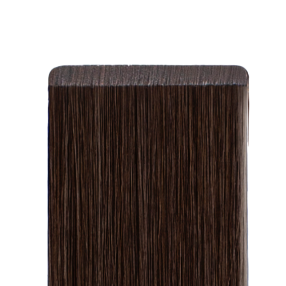
I chose to visit the salon and Kelsey recommended Jet Black 1 and Hawaii Balayage in our Remy tape-ins. Once I was color matched there was no need to order my hair as the salon also has a fully stocked store with all Glam Seamless hair extensions and products. Kelsey retrieved my future hair and I booked my appointment all-in-one.
Same-day appointments can be made when available. I booked same-day and my appointment experience began. I was offered a beverage of my choice (I chose a mimosa!) and was provided the pre-estimate of my appointment. Next, I was shown upstairs to the salon–it’s truly a VIP experience! To begin; Kelsey first washed my natural hair with a clarifying shampoo to remove any buildup and to help prevent the adhesive of the tapes from not sticking to my natural hair. Kelsey did not apply conditioner to my roots. This is key as it prevents tape slippage after the install. Afterwards, he blew out my natural hair and we double checked the color match before starting the install.
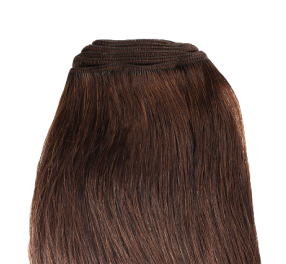
Two to three packs are typically recommended for a full installation of tape-ins. I have wavy hair with medium volume so Kelsey used two packs, one pack of the Jet Black 1 and one pack of the Hawaii Balayage, which equals twenty bonds. Kelsey mixed the colors by sandwiching the two colors together with the clamping tool, resulting in the most GORGEOUS blend! I had no idea how customizable tape-ins were and the Hawaii Balayage gave me a chemical-free color lift with pops of highlights. This was important to me as I like to avoid using chemicals on my hair. 


Once the tapes were installed; Kelsey gave me a custom cut to blend the tapes with my natural hair using both a razor and scissors. I went for the 20” because I want all the length and volume. Tip: It’s always better to select a longer extension and custom cut to a shorter length if desired. The custom cut was the final step to blending the Remy tape-ins perfectly with my naturally grown hair. Kelsey finished by styling my new locks. I opted for a modern take on the iconic “Farrah Fawcett” waves. My finished look was AMAZING and I felt amazing, too. Truly, I’m obsessed now. 
Once done, Kelsey went over the aftercare sheet with me and these tips made a difference in my first 72 hours of wear. Following proper care instructions ensures I will get the most out of my investment.
Key tips from the aftercare sheet I was provided:
- Semi-permanent extensions may feel a little heavy on your head at first. The good news is some sensitivity is typically normal and subsides within about 2-3 days once your scalp adjusts to the tape-ins. It really depends on your own personal level of sensitivity and if you are new to wearing a hair extension method. I’ve worn clip-ins, so I did not feel a tight or heavy sensation with tape-ins. The tape-ins were actually more comfortable for me.
- Do not wash your hair for up to 48 hours after the install to prevent slippage.
- Always use a sulfate-free shampoo and conditioner.
If you had asked me if I’d ever consider cheating on my beloved clip-ins with semi-permanent tape-ins I’d have said, “no way!”. Now that I’ve tried tape-ins, I’m a lifer! I hope I’ve inspired you to step out of your comfort zone and try something new. Believe me, it took all my nerve, but I’m so glad I did. Ready to get started? Visit our Soho or Weho locations anytime (walk-ins welcome!), or go online for your FREE color match. Then book an appointment at one of our salon locations; our Glam Seamless stylists are amazing and made me feel like a million bucks!
Before & After
Have questions or want to chat about your own hair journey? DM me over on our Insta. Talk soon!
Loving my new tape-ins!